Looks like I'm not the only one toying with getting Doom running on the metal. This is a post from a security researcher called Michael Jordon who found that some Canon Pixma printers have a vulnerability that means they can have custom firmware uploaded to them, and that the ARM processor and LCD display on the printer is just about capable of running Doom ...
http://www.contextis.co.uk/resources/blog/hacking-canon-pixma-printers-doomed-encryption/
(For the record, my first thought was a 0x10 key, don't know where he saw a 0x30 key in that data :p )
2014-09-16
2014-09-14
A Quick Catch-up
I've just published three older articles that I have had waiting in draft form for about three months because of work. Apologies for the delay in these. I have some more things to retrospectively post, then I'll actually get on and make some progress on actual code.
2014-05-31 Doom Windowing
2014-06-01 Input Events
2014-06-02 More Windowing Progress
2014-05-31 Doom Windowing
2014-06-01 Input Events
2014-06-02 More Windowing Progress
2014-06-09
2014-06-09 Animated GIFs
While I was working through some of the significant changes to the windowing system to get input events and window painting working, I thought it might be useful to have something a bit more light-weight than Doom to be able to test some things (not that Doom takes long to load anyway). I decided that getting images to load and display might be interesting, and I thought what better place to start than with animated GIFs (pronounced with a soft 'G' apparently, as in "Jug").


Examining all the GIF89a specifications, I was surprised to find that GIF files can easily have more than 256 colours per frame, and the fact that most graphics tools limit files to 256 colours is because they're poor implementations of the standard. That said, there is a question on how many programs could correctly read and display such a GIF (mental note: test major browsers for support).
Opening the files and working through the general container format for the GIF files was no different to any other graphics file format, the two really interesting parts are the multiple images per frame (how you get more than 256 colours per file and optimise animations) and the LZW encoding for the images.
When dealing with GIF files, each file contains a number of logical "screens" which are animation frames (one for a static GIF, multiple for an animated GIF), then each "screen" is built up of one or more "images". Each image provides a part of the screen image, so you could tile multiple images to make up each screen (each frame of animation). Each image has a palette limit of 256 colours, so by tiling as many "images" as you need to make up each "screen" you can easily get more than 256 colour GIF files. Most files, however, only use a single "image" per "screen" and are therefore limited to 256 colours.
The LZW encoding is more intricate, and there is a lot of conflicting and incomplete information on exactly how you go about interpreting the data. Because of this, I'm not going to go into detail on this until my implementation is complete to the point of working with all of my test images. Be aware that a lot of code posted on the internet under the heading of "LZW Decoding" is actually the GIF-specific variant of LZW coding.
Because the graphics output is the same window-system method as Doom is using, all the output is already in-place and tested, as long as I can build an appropriate Bitmap structure from the image data, and I get dithering for free if required.
Such poking and frustration later ...
Yes it does animate, but you'll have to take my word on that for now. I could create an animated GIF of my OS playing an animated GIF for you all to enjoy, but not today (Yo dawg, I heard you like animated GIFs ...). You can still see the section of border to the left of the graphic is still being overwritten, that's the VGA driver blitting routing still not supporting masking correctly.
I have a host of other animated GIF images, including some simple ones that Leah made for testing, but not all of them work. Some of them run the system out of memory (it only has a few meg for the memory manager at the moment), some of them have LZW coded data that causes my LZW decoder to fail (still need to find out why).
At some point, the code for loading the GIF files (currently incorporated into the Hello World test app) will be extracted out and built into a class to be loaded by the codec system, a part of the OS I'm really looking forward to writing :)
One of the benefits of writing all your own window manager code, including the routine to draw the window chrome, is that I get to do things like this:
The Amiga Kickstart 1.3 window chrome faithfully reproduced, loading a GIF of the boot screen. I also coded in another font that's closer to the Workbench standard. It isn't Topaz, but it's close.
I'm very happy with that :)
(I think that's the last article I had to publish from before my three month break from development, hopefully I get to do some new stuff now.)
2014-06-02
2014-06-02 More Windowing Progress
Good progress today, fixed a lot of the smaller bugs which were obvious from the last couple of days, and also got two big blocks of functionality into the VGA driver to make things better.
One of the things I'll call a "small bug" is that I've thrown some hacky code in to the current keyboard handler to gather the key up and key down events for the important keys and push them into the window manager, which then adds the events into the event queue for the "active" window. Because I can't currently select the "active" window, I have added a pointer to the "last opened window" (effectively the tail of the window list) to mimic this for now. I've removed the test code which pushed input events into new windows, and Doom is actually now playable.
Completed:
- Added the ability to blit bitmap objects onto the screen via the VGA driver. This means Doom is a lot faster again and has dithering back.
- Added an efficient DrawLine() function to the VGA driver. This greatly speeds up the window drawing.
- Fixed the KeyUp and Keydown events being reversed.
- Fixed the window title text being drawn in the wrong place.
- Added backspace handling to the window console mode.
Next steps:
- Fix the console scrolling.
- Identify the bug in the keyboard handling.
- Get all drawing routines to use the back buffer to re-enable double-buffering.
- Add the masking support to the Plot8() function (Doom left border problem)
- Identify why the Mode 12h code doesn't work on the Netbook.
- Investigate sound.
2014-06-01
2014-06-01 Input Events
Recently, I've been thinking about the minimal required implementation for getting input events wired into the windowing system as well. This is going to be a good step forward as I may actually be able to play Doom, rather than just watching the demos. I also had a call with +Pi nk for assistance and support with working this through, many thanks :)
The plan is to add a structure which represents a single input event which contains the event type (key down and key up to start with) and some data (which key), add a List to the window to store the input events, add a function to dequeue the next input event from a specific window and return it, and the window manager will need some method of getting keyboard events into the queue.
Reviewing how the Linux Doom source code processes input, it seems to fetch XWindow events in a similar manner, converts them into Doom input events, then calls a Doom function to push them into a queue. I'll reinstate a version of this code, but wired to get the event using my new function and modified to convert from my event structure into the Doom event.
One note here is that the XWindows GetEvent() function blocks if there are no events to serve, and the Doom code calls a separate function to determine if there are events ready so that the game doesn't stop every frame waiting for input. My function will return NULL if there are no events, so I'll need to adjust the code in Doom to account for this.
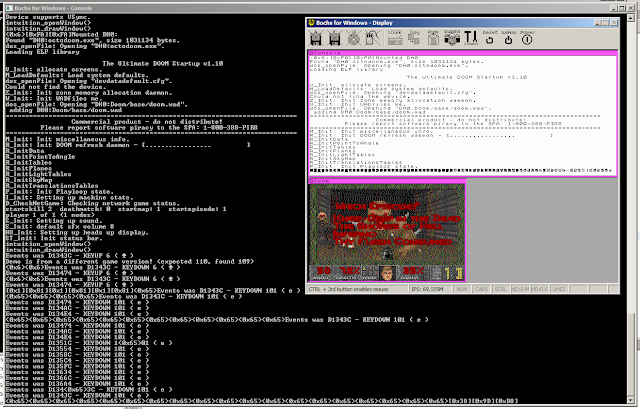
Having modified Doom to read and process the input events, I need to get some events into the queue. Whilst I do have a PS/2 keyboard handler in the kernel, it's wired up to output ASCII values from key down events only, where as we need key up and key down events for all the keys, even non-ASCII ones. In order to test the event pipeline and the event handling code in Doom, I've put some code into the OpenWindow() function to push some key presses into the event queue of the Doom window, specifically 'Escape', 'Enter', 'Enter', 'Enter' which should bring up the menu, select 'New Game', select the episode, then select the difficulty to start the game.
(The screenshot is from a slightly later test where some keyboard events are wired in ... spoliers)
The plan is to add a structure which represents a single input event which contains the event type (key down and key up to start with) and some data (which key), add a List to the window to store the input events, add a function to dequeue the next input event from a specific window and return it, and the window manager will need some method of getting keyboard events into the queue.
Reviewing how the Linux Doom source code processes input, it seems to fetch XWindow events in a similar manner, converts them into Doom input events, then calls a Doom function to push them into a queue. I'll reinstate a version of this code, but wired to get the event using my new function and modified to convert from my event structure into the Doom event.
One note here is that the XWindows GetEvent() function blocks if there are no events to serve, and the Doom code calls a separate function to determine if there are events ready so that the game doesn't stop every frame waiting for input. My function will return NULL if there are no events, so I'll need to adjust the code in Doom to account for this.
Having modified Doom to read and process the input events, I need to get some events into the queue. Whilst I do have a PS/2 keyboard handler in the kernel, it's wired up to output ASCII values from key down events only, where as we need key up and key down events for all the keys, even non-ASCII ones. In order to test the event pipeline and the event handling code in Doom, I've put some code into the OpenWindow() function to push some key presses into the event queue of the Doom window, specifically 'Escape', 'Enter', 'Enter', 'Enter' which should bring up the menu, select 'New Game', select the episode, then select the difficulty to start the game.
All this in place and it works a treat. Doom loads, then goes into the menu, and starts the game, leaving the character standing at the beginning of level 1. \ o /
2014-05-31
2014-05-31 Doom Windowing
Found some time today to look at some things. First thing to address is that since putting in the windowing code, Doom has failed to load and caused a recursive crash. While I haven't actually tracked the cause of this, it only happens if I compile using my Debug_Map configuration (a build configuration in the project which outputs the link map during the build, useful for debugging). It's probably something related to output directories or something, but I can work around it for now.
Before now, I had a special routine in the kernel library which accepted the kind of bitmap that Doom outputted and drew it to the screen. With the windowing system progressed, this has been slightly modified to accept a pointer to the window structure as well. Now, Doom calls OpenWindow() to create a window, then calls this DrawBitmap() function each frame to actually put the bitmap onto it. This new version of the DrawBitmap() function currently uses SetPixel() to draw each pixel on the screen one-at-a-time, which isn't fast, but should allow me to get things running and debugged more easily.
At the moment, the windowing system doesn't handle windows overlapping one another, or moving them, but there's plenty to do before worrying about minor things like that. I also broke the USB Mass Storage driver at some point, so I had to track two small bugs in this before I could test this on real hardware. I hadn't reset the USB port before calling SetAddress() against device 0, and I hadn't reset the transfer descriptor CurrentPage property between calls.
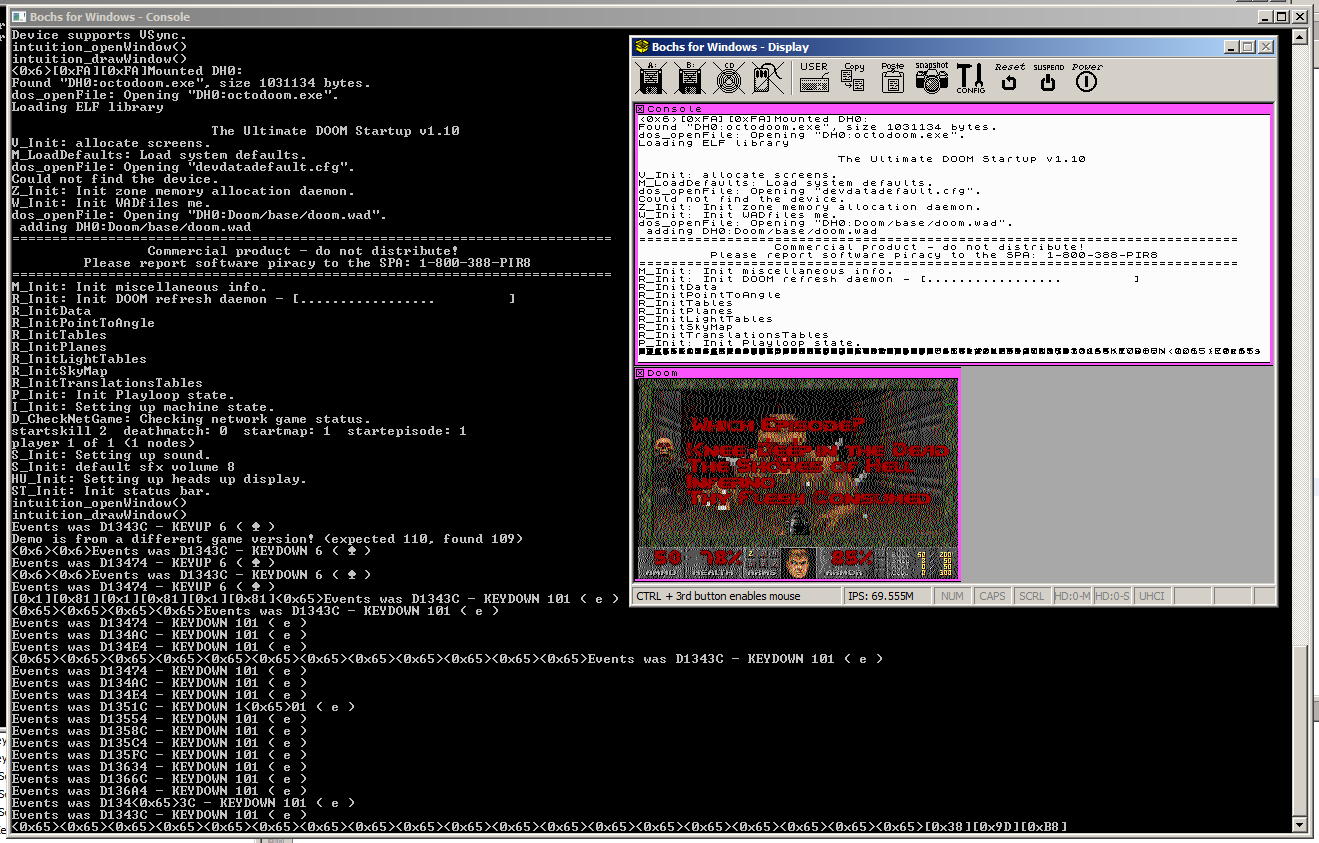
With these bits in place, Doom is running in a window on the screen, and is outputting the console text to the console window.

It's not fast, and it's not dithered currently, but it's working and running the Doom demos (I nearly know the demos off by heart now).
A few things stand out from this image which aren't quite correct
Before now, I had a special routine in the kernel library which accepted the kind of bitmap that Doom outputted and drew it to the screen. With the windowing system progressed, this has been slightly modified to accept a pointer to the window structure as well. Now, Doom calls OpenWindow() to create a window, then calls this DrawBitmap() function each frame to actually put the bitmap onto it. This new version of the DrawBitmap() function currently uses SetPixel() to draw each pixel on the screen one-at-a-time, which isn't fast, but should allow me to get things running and debugged more easily.
At the moment, the windowing system doesn't handle windows overlapping one another, or moving them, but there's plenty to do before worrying about minor things like that. I also broke the USB Mass Storage driver at some point, so I had to track two small bugs in this before I could test this on real hardware. I hadn't reset the USB port before calling SetAddress() against device 0, and I hadn't reset the transfer descriptor CurrentPage property between calls.
With these bits in place, Doom is running in a window on the screen, and is outputting the console text to the console window.
It's not fast, and it's not dithered currently, but it's working and running the Doom demos (I nearly know the demos off by heart now).
A few things stand out from this image which aren't quite correct
- The window title text for the Doom window is actually drawing over the Console window for some reason.
- The console text doesn't scroll, so when it gets to the bottom, it just overwrites the last line.
- Many other things :)
2014-05-16
2014-05-16 Graphics and Windowing
I've been working through putting in a skeleton windowing system in, although this has required a large rework of the graphics system. This hasn't actually been a bad thing as it has given me opportunity to add a "Bitmap" structure.
So, what's so special about the bitmap structure? Well, it starts off being the header of a generic, in-memory bitmap. In this form, it has a width and height, it has optional palette information, it has details of the layout, format of the pixels and the "pitch" of the bitmap (the number of bytes per pixel row, including padding), and a pointer to start of the actual bitmap data.
Alongside the bitmap structure, we have graphics functions which accept a pointer to a bitmap structure and perform some operation on them. The basic functions are:
I won't explain all of these in detail, but the non-self-explanatory parts ...
So, all very boring, why am I that happy with it? Well, the bitmap structure also contains a series of function pointers for the same graphics operations and if these pointers are non-null, the graphics functions above will just call the given function (this is similar to the operations structure in the FILE structure in C). These functions allow it to integrate very well with the windowing functions.
Still not getting it, okay, how about "every graphics device is represented by a bitmap structure"? That do anything for ya? It's polymorphism, Holmes!
Yes, each monitor / screen / graphics device is represented by a bitmap structure that is known to the windowing system, so drawing to the screen is as easy as drawing to any in-memory bitmap, and uses the same functions to do it. If you want to draw a line on the screen, no problem. If you want to "block transfer" (known as Blitting) a window bitmap to the screen, you call the graphics blitting routines. If you want to read a section of the screen, you blit from the screen to a bitmap.
A graphics device which is using a memory-mapped framebuffer needs nothing more than the bitmap structure which defines the structure and location of the framebuffer. If the graphics device is more complicated, or offers some form of hardware acceleration, it has a bitmap structure which provides functions for the various function pointers which the graphics routines call. This is the case for the VGA Mode 12h driver because of its planar structure and requirement to use a windowing function to access the entire bitmap.
Each window in the system can have a bitmap to act as a back-buffer, but it doesn't need one. If a program tries to draw to its window and it has a bitmap, the drawing routines draw to the bitmap, then if that area of the window is visible on-screen, the window bitmap is "blitted" (with a mask) onto the screen (or screens) with which it intersects. If the window doesn't have a bitmap, the graphics routines are translated directly to the screen(s) with the mask bitmap set to account for the window being partially or wholly obscured by other windows.
A future enhancement for this whole caboodle is to incorporate the ability to add a 2D transform matrix to into the system at some point (not worked out where yet) so that bitmaps, windows, and even screens can be scaled, rotated, sheared, translated and whatnot to no end of amusement. :D
Anyway, I'll leave you with a picture of what is currently the system console window with my beautifully hand-crafted window border design ...

(Did I mention the library system was working?)
So, what's so special about the bitmap structure? Well, it starts off being the header of a generic, in-memory bitmap. In this form, it has a width and height, it has optional palette information, it has details of the layout, format of the pixels and the "pitch" of the bitmap (the number of bytes per pixel row, including padding), and a pointer to start of the actual bitmap data.
Alongside the bitmap structure, we have graphics functions which accept a pointer to a bitmap structure and perform some operation on them. The basic functions are:
bitmap_t* allocateBitmap( uint16 pWidth, uint16 pHeight, uint16 pPaletteSize, colourType_t pPaletteType );
void freeBitmap( bitmap_t* pBitmap );
uint32 getNearestPaletteEntry( bitmap_t* pBitmap, colour_t pColour );
void setPaletteEntry( bitmap_t* pBitmap, uint32 pPaletteEntry, colour_t pColour );
colour_t getPixel( bitmap_t* pBitmap, uint16 pX, uint16 pY );
void setPixel( bitmap_t* pBitmap, uint16 pX, uint16 pY, colour_t pColour );
void drawLine( bitmap_t* pBitmap, bitmap_t* pMask, int32 pX1, int32 pY1, int32 pX2, int32 pY2, colour_t pColour );
void drawRectangle( bitmap_t* pBitmap, bitmap_t* pMask, int32 pX1, int32 pY1, int32 pX2, int32 pY2, colour_t pColour );
void fillRectangle( bitmap_t* pBitmap, bitmap_t* pMask, int32 pX1, int32 pY1, int32 pX2, int32 pY2, int32 pColour );
void placeChar( bitmap_t* pBitmap, bitmap_t* pMask, font_t pFont, int pCharacter, int32 pX, int32 pY, int32 pColour );
void blitLocal( bitmap_t* pBitmap, bitmap_t* pMask, uint32 pSourceX, uint32 pSourceY, uint32 pWidth, uint32 pHeight, uint32 pDestinationX, uint32 pDestinationY);
void blitRemote( bitmap_t* pSourceBitmap, uint32 pSourceX, uint32 pSourceY, uint32 pWidth, uint32 pHeight, bitmap_t* pDestinationBitmap, bitmap_t* pMask, uint32 pDestinationX, uint32 pDestinationY);
I won't explain all of these in detail, but the non-self-explanatory parts ...
- The mask is a binary bitmap the same size as the bitmap object, but the drawing routine can only alter a pixel in the given bitmap if the corresponding pixel in the mask bitmap is on. Often though, the mask will be null, which means that no masking is to be performed.
- The "nearest colour" functionality from the Displaying Images in 16 Colours article is also incorporated into the graphics function with the mapping table stored as part of the bitmap structure itself.
- BlitLocal is for copying ("Block Transferring") a rectangle of bitmap to somewhere else in the same bitmap.
- BlitRemote is for copying from one bitmap to another bitmap.
So, all very boring, why am I that happy with it? Well, the bitmap structure also contains a series of function pointers for the same graphics operations and if these pointers are non-null, the graphics functions above will just call the given function (this is similar to the operations structure in the FILE structure in C). These functions allow it to integrate very well with the windowing functions.
Still not getting it, okay, how about "every graphics device is represented by a bitmap structure"? That do anything for ya? It's polymorphism, Holmes!
Yes, each monitor / screen / graphics device is represented by a bitmap structure that is known to the windowing system, so drawing to the screen is as easy as drawing to any in-memory bitmap, and uses the same functions to do it. If you want to draw a line on the screen, no problem. If you want to "block transfer" (known as Blitting) a window bitmap to the screen, you call the graphics blitting routines. If you want to read a section of the screen, you blit from the screen to a bitmap.
A graphics device which is using a memory-mapped framebuffer needs nothing more than the bitmap structure which defines the structure and location of the framebuffer. If the graphics device is more complicated, or offers some form of hardware acceleration, it has a bitmap structure which provides functions for the various function pointers which the graphics routines call. This is the case for the VGA Mode 12h driver because of its planar structure and requirement to use a windowing function to access the entire bitmap.
Each window in the system can have a bitmap to act as a back-buffer, but it doesn't need one. If a program tries to draw to its window and it has a bitmap, the drawing routines draw to the bitmap, then if that area of the window is visible on-screen, the window bitmap is "blitted" (with a mask) onto the screen (or screens) with which it intersects. If the window doesn't have a bitmap, the graphics routines are translated directly to the screen(s) with the mask bitmap set to account for the window being partially or wholly obscured by other windows.
A future enhancement for this whole caboodle is to incorporate the ability to add a 2D transform matrix to into the system at some point (not worked out where yet) so that bitmaps, windows, and even screens can be scaled, rotated, sheared, translated and whatnot to no end of amusement. :D
Anyway, I'll leave you with a picture of what is currently the system console window with my beautifully hand-crafted window border design ...
(Did I mention the library system was working?)
2014-03-29
2014-03-29 Library Memory Mapping
I haven't posted anything for a while, there's a big project on at work which is taking up a lot of my time.
I've been thinking about libraries and how they will work, mainly in how the memory management will work in such a way that it will work for the library and the whatever the program is doing.
Having considered and investigated various approaches, I think I've come up with the best solution.
At the point the program starts executing, the kernel has set up an address space, and loaded the program text (the code) at address 0, followed by the data and bss (uninitialised data) as set by the executable file. The stack of the program will have been set at some arbitrarily high address, such as the top of the address space. The kernel will have set and be keeping track of the "stack break" value, which is the top of the heap. This state is shown in A below.

Note that because this program was written in C, it has the appropriate C library has been linked into the program executable, and includes the malloc() function and memory management functions. It's also possible that this program may have been written purely in assembly in which case it won't have a C library and will have some other form of memory management.
The first time that the program calls the malloc() function (or during the C library initialisation, depending on the library), the memory allocator in the program's C library will make a call to the kernel function sbrk() to move the break value up by a certain amount, maybe a few megabytes, as shown in B. The memory allocator in the program will then use this space for any allocations needed by the program. When this space has all been allocated, the memory allocator makes another call to sbrk() to get another part of the address space.
Imagine that the program now wants to load a maths library. It calls the kernel function openLibrary(), requesting the library. The kernel locates the library, and moves the break value of the process up again to secure an area of the address space for the new library, and loads it. This is shown in C.
Note again that this library has also been written in C and linked to its C library, but this C library may be different to the one in the program in such a way as to be incompatible. This would prevent the maths library from using the malloc() implementation that is in the C library of the program.
If the newly-loaded Maths library now wants to allocate some memory for itself, it will make a separate call to the kernel sbrk() function. This returns another area of the address space, which the memory allocator in the Library then uses for allocations. This is shown in D.
So, if the program now more space to use for more allocations, it can make another call to sbrk() which will return another slice of the address space pie. This new space won't be contiguous with the previously allocated program memory space, but that's OK because the memory allocator in the program's C library won't worry about that.
All right, I think that's enough for now, I think it all makes sense and should work for any combination of programs and libraries, regardless of whether they're using the standard C library, a non-standard C library, or just some custom assembly for memory management, as long as they all behave and use sbrk() and openLibrary() correctly. I know I haven't mentioned mmap() but it should follow the same rules.
I've been thinking about libraries and how they will work, mainly in how the memory management will work in such a way that it will work for the library and the whatever the program is doing.
Having considered and investigated various approaches, I think I've come up with the best solution.
At the point the program starts executing, the kernel has set up an address space, and loaded the program text (the code) at address 0, followed by the data and bss (uninitialised data) as set by the executable file. The stack of the program will have been set at some arbitrarily high address, such as the top of the address space. The kernel will have set and be keeping track of the "stack break" value, which is the top of the heap. This state is shown in A below.
Note that because this program was written in C, it has the appropriate C library has been linked into the program executable, and includes the malloc() function and memory management functions. It's also possible that this program may have been written purely in assembly in which case it won't have a C library and will have some other form of memory management.
The first time that the program calls the malloc() function (or during the C library initialisation, depending on the library), the memory allocator in the program's C library will make a call to the kernel function sbrk() to move the break value up by a certain amount, maybe a few megabytes, as shown in B. The memory allocator in the program will then use this space for any allocations needed by the program. When this space has all been allocated, the memory allocator makes another call to sbrk() to get another part of the address space.
Imagine that the program now wants to load a maths library. It calls the kernel function openLibrary(), requesting the library. The kernel locates the library, and moves the break value of the process up again to secure an area of the address space for the new library, and loads it. This is shown in C.
Note again that this library has also been written in C and linked to its C library, but this C library may be different to the one in the program in such a way as to be incompatible. This would prevent the maths library from using the malloc() implementation that is in the C library of the program.
If the newly-loaded Maths library now wants to allocate some memory for itself, it will make a separate call to the kernel sbrk() function. This returns another area of the address space, which the memory allocator in the Library then uses for allocations. This is shown in D.
So, if the program now more space to use for more allocations, it can make another call to sbrk() which will return another slice of the address space pie. This new space won't be contiguous with the previously allocated program memory space, but that's OK because the memory allocator in the program's C library won't worry about that.
All right, I think that's enough for now, I think it all makes sense and should work for any combination of programs and libraries, regardless of whether they're using the standard C library, a non-standard C library, or just some custom assembly for memory management, as long as they all behave and use sbrk() and openLibrary() correctly. I know I haven't mentioned mmap() but it should follow the same rules.
2014-02-01
2014-02-01 Further Tweaks
I gave a short demo of Doom running on the Revo to a few friends (because the video was so poor) and came away with a number of suggestions:
I've been looking into fixing the smaller items on this list. The vertical sync was the easiest one, it was 3 lines of code. In the function to update the front buffer from the back buffer, I put in a spin-lock to wait for the VGA device to be in the vertical retrace period before it started the swap.
I found that the VGA emulation in Bochs doesn't actually support the vertical retrace register, which was a bit disappointing as this means Doom now freezes before the first frame in this spinlock waiting for a VSync that will never come. I mitigated this by adding code to the VGA initialise() routine to test to see if the vertical retrace register changes value in 100 milliseconds. There should be 6 vertical retraces in this time (assuming 60Hz), so if the value never changes I assume the register isn't supported and clear the "Enable VSync" flag.
I also investigated why the "wipe" in Doom wasn't working. The wipe is used when the game is transitioning to the game from the menu or vice versa. The problem was easily resolved. When I had removed the code from the I_Video.c file to get Doom to compile without the Linux specific video code, I had removed the content of the I_ReadScreen() function which is used to perform this wipe. It just returns data from Doom's own internal buffer, so I didn't need to change it and shouldn't have removed it. With the code reinstated, the wipe now works and as an added benefit, the background for the HUD now appears correctly.
Next I have looked into the load time issue because it really shouldn't take five minutes to load. My first plan is to increase the amount of data that I transfer from the USB device in each transfer. Currently I transfer one block at a time as required and cache it in the block device driver in case it gets accessed again next time. If I increase this to load 8 blocks at a time (aligned to an 8 block boundary), this shouldn't take any more time to load from the USB (I figure I can transfer just over 100 blocks in a 1ms frame assuming USB2 speeds and no bus contention) and should improve reading from subsequent blocks. With this change in place, the load time is now a respectable 38 seconds.
Still not happy with that though. The next target is the delay I have while I wait for the USB bus to transfer the data. Because my OS has the Programmable Interrupt Timer set to 100Hz, my delay function has a maximum granularity of 10ms and I'm using two such delays in the block loading (one after issuing the request, one while waiting for the response). To replace these, I've written a helper function which will examine the status flags on the USB Transfer Descriptors and will spinlock until they are processed with whatever result. As the USB transfer should complete in under 1ms, this should save 19ms per 8 blocks loaded.
With all that debugged, The OS goes from the Grub screen to the Doom splash screen in 3 seconds ... boom!
- Fixing the VSync issue
- USB Keyboard Device and Input Queue to make the game playable
- Sound and Music
- Finding out the actual frame rate
- USB Serial interface for streaming console output
- USB Flash Drive performance
- Doing happy dance
I've been looking into fixing the smaller items on this list. The vertical sync was the easiest one, it was 3 lines of code. In the function to update the front buffer from the back buffer, I put in a spin-lock to wait for the VGA device to be in the vertical retrace period before it started the swap.
I found that the VGA emulation in Bochs doesn't actually support the vertical retrace register, which was a bit disappointing as this means Doom now freezes before the first frame in this spinlock waiting for a VSync that will never come. I mitigated this by adding code to the VGA initialise() routine to test to see if the vertical retrace register changes value in 100 milliseconds. There should be 6 vertical retraces in this time (assuming 60Hz), so if the value never changes I assume the register isn't supported and clear the "Enable VSync" flag.
I also investigated why the "wipe" in Doom wasn't working. The wipe is used when the game is transitioning to the game from the menu or vice versa. The problem was easily resolved. When I had removed the code from the I_Video.c file to get Doom to compile without the Linux specific video code, I had removed the content of the I_ReadScreen() function which is used to perform this wipe. It just returns data from Doom's own internal buffer, so I didn't need to change it and shouldn't have removed it. With the code reinstated, the wipe now works and as an added benefit, the background for the HUD now appears correctly.
Next I have looked into the load time issue because it really shouldn't take five minutes to load. My first plan is to increase the amount of data that I transfer from the USB device in each transfer. Currently I transfer one block at a time as required and cache it in the block device driver in case it gets accessed again next time. If I increase this to load 8 blocks at a time (aligned to an 8 block boundary), this shouldn't take any more time to load from the USB (I figure I can transfer just over 100 blocks in a 1ms frame assuming USB2 speeds and no bus contention) and should improve reading from subsequent blocks. With this change in place, the load time is now a respectable 38 seconds.
Still not happy with that though. The next target is the delay I have while I wait for the USB bus to transfer the data. Because my OS has the Programmable Interrupt Timer set to 100Hz, my delay function has a maximum granularity of 10ms and I'm using two such delays in the block loading (one after issuing the request, one while waiting for the response). To replace these, I've written a helper function which will examine the status flags on the USB Transfer Descriptors and will spinlock until they are processed with whatever result. As the USB transfer should complete in under 1ms, this should save 19ms per 8 blocks loaded.
With all that debugged, The OS goes from the Grub screen to the Doom splash screen in 3 seconds ... boom!
2014-01-31
2014-01-31 Doom on Real Hardware
"So let's change the main() routine back to loading the Doom executable and see what happens."
Well, the short answer is this:
I didn't want to post this before because the video quality is quite terrible because it's a camera pointing at the monitor, but it shows off the frame rate quite nicely. As it turns out, all the frame rate concerns I had were completely due to the Bochs emulator, and on real hardware it just flies.
So, let's break it down ...
Firstly, the audio. The Octopus kernel has no support for sound yet, and while the music is a really good fit, it was added with YouTube to replace the terrible background noise and camera zoom noise.
The video has some significant banding on it. This is because it's not using the Vertical Retrace interval (VSync) to update the screen. I have the back buffer already, so this should be easy to implement.
Currently, Doom takes around four and a half minutes to load (most of which I didn't bother to record) but then as the game loads more data on the fly, it pauses briefly. You can see the reflection of the blue light on the USB stick flashing at the bottom of the screen when it does this.
I have a list of things to address in the short term including:
- the load time,
- the VSync
- a big code refactor
- getting a half-decent recording
2014-01-30
2014-01-30 USB EHCI
"Hmmm, USB Midi devices? Actually, probably the best thing to use is my USB IO board. Actually, probably the best thing to do is to stop procrastinating and write the bloody EHCI mass storage code :("
So I'm onto to investigating EHCI (USB2). I've already spent some time looking through the specifications and one of the most notable differences compared to UHCI is the way that Queue Heads are used. In UHCI, the Queue Heads are arbitrary structures that are only used by software to organise Transfer Descriptors as it sees fit. In EHCI, the Queue Heads contain all the information that pertains to a single USB Device Endpoint. This makes a lot of sense as the transfer descriptors don't need to duplicate all this information each and every time, they can be linked to the Queue Head which will contain it.
Another significant difference is that the Frame List for periodic, scheduled transfers has been separated away from the "reclamation" list of transfers to happen as soon as possible (what it refers to as the Asynchronous list).
If you read the UHCI article, you'll know that I tried to disable the EHCI controller before by adjusting the CONFIGURE flag. Turns out that I may have missed a fairly vital step from that code that I have implemented this time around. The EHCI controller has a flag in it to indicate if it is "owned" by the BIOS (for USB legacy support of keyboards and whatnot) and another for if it is "owned" by the OS (which is what we want). There is a protocol for requesting ownership from the BIOS so the two code-bases aren't competing and confusing things. That actually explains some of the problems I was having before ...
After writing structures which match the EHCI Queue Head and Transfer Descriptors (called a Queue Element Transfer Descriptor) from the specification, I have used many of same steps as the UHCI code to reset the EHCI controller. I have also created three Queue Head structures as global variables, one for the Control endpoint of the Flash Drive, and one each for the Bulk In and Bulk Out endpoints that the USB Mass Storage Class specification says it should have. I have connected these three Queue Heads together in a linked list, programmed the EHCI adapter with the start address and set it running. My intention is to create Transfer Descriptors as required and add them to the linked list from the relevant Queue Head.
One note about the structures for the Queue Head and the other USB in-memory structures is that they all have to be aligned to specific byte alignments. I'll admit I may have cheated here and padded each of the structures to a multiple of their required alignment. This allows me to create an array of each type of structure and for every element of the array to be correctly aligned.
In order to test that the EHCI controller was actually parsing the list of queue heads, I changed some of the Queue Head values to be gibberish and confirmed that the EHCI controller reported an error (tee hee).
The EHCI controller has the same "Port Status and Control" registers, and I have written some code to loop through these and display the values of the various status bits. This I have used with a single test device to identify which port numbers correspond to which physical ports.
Happy that the Queue Heads are working correctly, I've moved onto forming a few Transfer descriptors to try to get the device descriptor for my test device.
64-bit Woes
At this point, I will spare you many of the details, but there was a lot of swearing and many many hours (days) of reading back and forth through the EHCI specification, my code, a whole load of articles on-line and my book on USB all to try to track down a single issue that had a stupid cause. The issue was that as the EHCI controller processed the transfer descriptor, it experienced a transfer error (not surprising at the moment) but then the USB controller encountered a "Serious Error" and stopped itself. With investigation, the transfer descriptor was being copied into the Queue head (which is correct) but in doing so it appeared to overwrite the beginning of the next queue head, which caused the queue processing to fail. The irritatingly simple answer was that the EHCI controller is 64-bit capable and as such, I need to use the 64-bit version of the Transfer Descriptor, which is longer than the 32-bit one that I had coded. The adapter copied this extra length, and trashed the following data.
Once that was fixed, progress was swift, and I soon had the device returning its device descriptor.
Device Descriptors
In USB, every device has a Device Descriptor which gives basic information about the device, including the number of configurations it has (almost every device only has one configuration though). It then has one Configuration Descriptor for each configuration which includes a number of Interface Descriptors and Endpoint Descriptors. It's important to note here (as it kept me confused for a day) that when you issue the GET_DESCRIPTOR request for each Configuration Descriptor, the Interface and Endpoint Descriptors for that Configuration are returned IN THE SAME REQUEST, then you parse them for the interface and endpoint details.
With all this information, I was able to read the Device Descriptor and read the single Configuration Descriptor (good) which had a single Interface Descriptor (with a class of Mass Storage device, good) and two Endpoint Descriptors (on for data in, one for data out). The interface descriptor also told me that the device used the SCSI command set to actually read and write blocks which is fine because I used this briefly before when writing an ATAPI driver for CD-ROMs.
At this point, I got bored and rather than writing a proper parser to read this information to set up the queue heads for the mass storage endpoints, I just hard-coded the endpoint numbers and the other parameters. They won't change for this device and I'm keen to keep up the progress.
Next thing to do is to actually send the SCSI command to the correct endpoint to request the data. For this, the USB Mass storage specification says that I create a Command Block Wrapper (CBW) structure which wraps the SCSI command for the transfer, and use a Command Status Wrapper structure to receive the SCSI response. I've played around with a few different SCSI commands, but that only one that seems to not error is the READ(10) command (so called because it is a 10-byte buffer that represents the command), but with this IT HAS READ A BLOCK!! tada.wav!
One odd thing here is that if I issue a SCSI command that is invalid, the error is reported by the device endpoint halting. This is really annoying as surely this error should be reported in the SCSI status data. I don't know if all USB mass storage devices do this, but in my view this breaks encapsulation. If the SCSI command is invalid or fails, then the SCSI response should indicate this, not the USB layer.
With this success, I have run a few stress tests, and unfortunately it stopped reading blocks after 50 or so, this was a fairly simple cause in that I wasn't free()ing the CBW and CSW structures, so eventually I was running out of memory (I only keep a small amount of memory available to the kernel to discover such memory leaks).
The Block Device Driver
Now that the EHCI controller is capable of reading blocks, I have created my OS's wrapper structure for the USB mass storage device (this structure is the one that provides a consistent interface for all block devices with such functions as ReadBlock() and WriteBlock()).
In debugging this, I encountered another issue I hadn't expected. Now that I'm testing on real hardware the memory is not clear when the machine boots, instead is contains a good deal of whatever was in it before the last reboot. This caused some issues where I had been sloppy and not properly cleared memory that I had allocated prior to using it and the code had assumed that unset areas were zero (bad practice, I know). A quick tweak to the malloc() routine and all memory is being cleared automatically when it is allocated (although I guess I should use calloc()).
Ok, now what?
Filesystem Testing
When I encountered this error before, it was because the file seeking wasn't working properly and it couldn't seek to the end of the WAD file where the index is. Rather than continue to use Doom to validate the filesystem code, I thought I'd take a different approach.
I have written a small .NET program which generates a 16Mb file of random data, which it then tweaks so that every 512-byte block of the file checksums to a specific value which is 0xBEEF0000 where the lower 16 bits contain the block number. Using this file on the key and a checksumming algorithm in the kernel (referred to as the Beef Test), I can quickly test various file operations to make sure they are behaving correctly.
With the aid of this, I was able to track down one of those really-simple-but-hard-to-debug issues. It was a simple matter of the USB device driver dereferencing a NULL pointer, then using the resultant information as the size to a memcpy() operation, which wrote beyond the allocated memory block, which trashed the memory block header, which made the memory allocator think it was out of memory, which caused an allocation in a completely different part of the kernel to fail and error.
If I get the OS working with any hair left, it'll be impressive.
Anyway, according to my checksum test file, all the file operations from the USB flash drive are working, the system is capable of reading a 16MB file without issue, and there are no memory leaks being encountered.
So let's change the main() routine back to loading the Doom executable and see what happens.
So I'm onto to investigating EHCI (USB2). I've already spent some time looking through the specifications and one of the most notable differences compared to UHCI is the way that Queue Heads are used. In UHCI, the Queue Heads are arbitrary structures that are only used by software to organise Transfer Descriptors as it sees fit. In EHCI, the Queue Heads contain all the information that pertains to a single USB Device Endpoint. This makes a lot of sense as the transfer descriptors don't need to duplicate all this information each and every time, they can be linked to the Queue Head which will contain it.
Another significant difference is that the Frame List for periodic, scheduled transfers has been separated away from the "reclamation" list of transfers to happen as soon as possible (what it refers to as the Asynchronous list).
If you read the UHCI article, you'll know that I tried to disable the EHCI controller before by adjusting the CONFIGURE flag. Turns out that I may have missed a fairly vital step from that code that I have implemented this time around. The EHCI controller has a flag in it to indicate if it is "owned" by the BIOS (for USB legacy support of keyboards and whatnot) and another for if it is "owned" by the OS (which is what we want). There is a protocol for requesting ownership from the BIOS so the two code-bases aren't competing and confusing things. That actually explains some of the problems I was having before ...
After writing structures which match the EHCI Queue Head and Transfer Descriptors (called a Queue Element Transfer Descriptor) from the specification, I have used many of same steps as the UHCI code to reset the EHCI controller. I have also created three Queue Head structures as global variables, one for the Control endpoint of the Flash Drive, and one each for the Bulk In and Bulk Out endpoints that the USB Mass Storage Class specification says it should have. I have connected these three Queue Heads together in a linked list, programmed the EHCI adapter with the start address and set it running. My intention is to create Transfer Descriptors as required and add them to the linked list from the relevant Queue Head.
One note about the structures for the Queue Head and the other USB in-memory structures is that they all have to be aligned to specific byte alignments. I'll admit I may have cheated here and padded each of the structures to a multiple of their required alignment. This allows me to create an array of each type of structure and for every element of the array to be correctly aligned.
In order to test that the EHCI controller was actually parsing the list of queue heads, I changed some of the Queue Head values to be gibberish and confirmed that the EHCI controller reported an error (tee hee).
The EHCI controller has the same "Port Status and Control" registers, and I have written some code to loop through these and display the values of the various status bits. This I have used with a single test device to identify which port numbers correspond to which physical ports.
Happy that the Queue Heads are working correctly, I've moved onto forming a few Transfer descriptors to try to get the device descriptor for my test device.
64-bit Woes
At this point, I will spare you many of the details, but there was a lot of swearing and many many hours (days) of reading back and forth through the EHCI specification, my code, a whole load of articles on-line and my book on USB all to try to track down a single issue that had a stupid cause. The issue was that as the EHCI controller processed the transfer descriptor, it experienced a transfer error (not surprising at the moment) but then the USB controller encountered a "Serious Error" and stopped itself. With investigation, the transfer descriptor was being copied into the Queue head (which is correct) but in doing so it appeared to overwrite the beginning of the next queue head, which caused the queue processing to fail. The irritatingly simple answer was that the EHCI controller is 64-bit capable and as such, I need to use the 64-bit version of the Transfer Descriptor, which is longer than the 32-bit one that I had coded. The adapter copied this extra length, and trashed the following data.
Once that was fixed, progress was swift, and I soon had the device returning its device descriptor.
Device Descriptors
In USB, every device has a Device Descriptor which gives basic information about the device, including the number of configurations it has (almost every device only has one configuration though). It then has one Configuration Descriptor for each configuration which includes a number of Interface Descriptors and Endpoint Descriptors. It's important to note here (as it kept me confused for a day) that when you issue the GET_DESCRIPTOR request for each Configuration Descriptor, the Interface and Endpoint Descriptors for that Configuration are returned IN THE SAME REQUEST, then you parse them for the interface and endpoint details.
With all this information, I was able to read the Device Descriptor and read the single Configuration Descriptor (good) which had a single Interface Descriptor (with a class of Mass Storage device, good) and two Endpoint Descriptors (on for data in, one for data out). The interface descriptor also told me that the device used the SCSI command set to actually read and write blocks which is fine because I used this briefly before when writing an ATAPI driver for CD-ROMs.
At this point, I got bored and rather than writing a proper parser to read this information to set up the queue heads for the mass storage endpoints, I just hard-coded the endpoint numbers and the other parameters. They won't change for this device and I'm keen to keep up the progress.
Next thing to do is to actually send the SCSI command to the correct endpoint to request the data. For this, the USB Mass storage specification says that I create a Command Block Wrapper (CBW) structure which wraps the SCSI command for the transfer, and use a Command Status Wrapper structure to receive the SCSI response. I've played around with a few different SCSI commands, but that only one that seems to not error is the READ(10) command (so called because it is a 10-byte buffer that represents the command), but with this IT HAS READ A BLOCK!! tada.wav!
One odd thing here is that if I issue a SCSI command that is invalid, the error is reported by the device endpoint halting. This is really annoying as surely this error should be reported in the SCSI status data. I don't know if all USB mass storage devices do this, but in my view this breaks encapsulation. If the SCSI command is invalid or fails, then the SCSI response should indicate this, not the USB layer.
With this success, I have run a few stress tests, and unfortunately it stopped reading blocks after 50 or so, this was a fairly simple cause in that I wasn't free()ing the CBW and CSW structures, so eventually I was running out of memory (I only keep a small amount of memory available to the kernel to discover such memory leaks).
The Block Device Driver
Now that the EHCI controller is capable of reading blocks, I have created my OS's wrapper structure for the USB mass storage device (this structure is the one that provides a consistent interface for all block devices with such functions as ReadBlock() and WriteBlock()).
In debugging this, I encountered another issue I hadn't expected. Now that I'm testing on real hardware the memory is not clear when the machine boots, instead is contains a good deal of whatever was in it before the last reboot. This caused some issues where I had been sloppy and not properly cleared memory that I had allocated prior to using it and the code had assumed that unset areas were zero (bad practice, I know). A quick tweak to the malloc() routine and all memory is being cleared automatically when it is allocated (although I guess I should use calloc()).
===========================================================================
                 Commercial product - do not distribute!
         Please report software piracy to the SPA: 1-800-388-PIR8
===========================================================================
M_Init: Init miscellaneous info.
R_Init: Init DOOM refresh daemon - Error: W_GetNumForName: PNAMES not found!
Exited!
Ok, now what?
Filesystem Testing
When I encountered this error before, it was because the file seeking wasn't working properly and it couldn't seek to the end of the WAD file where the index is. Rather than continue to use Doom to validate the filesystem code, I thought I'd take a different approach.
I have written a small .NET program which generates a 16Mb file of random data, which it then tweaks so that every 512-byte block of the file checksums to a specific value which is 0xBEEF0000 where the lower 16 bits contain the block number. Using this file on the key and a checksumming algorithm in the kernel (referred to as the Beef Test), I can quickly test various file operations to make sure they are behaving correctly.
With the aid of this, I was able to track down one of those really-simple-but-hard-to-debug issues. It was a simple matter of the USB device driver dereferencing a NULL pointer, then using the resultant information as the size to a memcpy() operation, which wrote beyond the allocated memory block, which trashed the memory block header, which made the memory allocator think it was out of memory, which caused an allocation in a completely different part of the kernel to fail and error.
If I get the OS working with any hair left, it'll be impressive.
Anyway, according to my checksum test file, all the file operations from the USB flash drive are working, the system is capable of reading a 16MB file without issue, and there are no memory leaks being encountered.
So let's change the main() routine back to loading the Doom executable and see what happens.
2014-01-12
2014-01-12 USB UHCI
Ok, so on with the USB coding. I'm starting with the UHCI controller (which is one of the USB 1 standards) as my test machine has a UHCI adapter in it.
Introduction to USB
When you want the USB adapter to perform a data transfer of some sort, you create a structure called a Transfer Descriptor in memory and add it onto the end of a linked list of work. The USB adapter periodically scans this list and performs any outstanding work it finds.
As well as Transfer Descriptors, USB also has a structure called a Queue Head. These aren't important as far as what data gets sent to the devices, but they are really useful on the software side to organise and arrange Transfer Descriptors in a sensible manner. For example, we could have one Queue Head for each device to keep things tidy.
The starting point for all of this (and the first thing we need to configure) is a register in I/O space which holds the beginning of the Frame List. This is an array of 1024 pointers, each of which is the start of a separate list of work. Each millisecond, the USB adapter moves to the next entry in the frame list and does all the work.
"Why 1024 separate lists? Why not just one list?" I hear you cry. Sometimes you need to transfer data that is time dependant, such as data from a USB camera or data to a USB sound device. As one entry of the frame list is examined per millisecond, you can add work to the list that won't be processed until later on. Using the sound device example, you need to keep the sound device loaded with data at the right time so that it can keep playing, and the USB frame list allows you to queue up the next second's-worth of sound data and forget about it. USB refers to these transfers as Isochronous (in USB 1) or Periodic (in USB 2).
"But what about transfers that I want as soon as possible?" For this we create a Queue Head, and we add all this non-time dependent work to this Queue Head. This makes a list which the USB specification refers to as the Reclamation list. Each of the frame list pointers then points to the time-dependent-work-for-this-millisecond which then points to the reclamation list. Frame list pointers with no time-dependent work just point straight to the reclamation list. This means that for each millisecond, the USB adapter transfers the data that is scheduled for that millisecond, then uses the remaining time to do anything from the reclamation list that it can fit in.
Implementing
So, first off we create a Queue Head structure, and set its pointer to a special value called the TERMINATE value. This just indicates to the USB adapter that this is the end of the list and there is no more work to do. Then we allocate the Frame List which is 1024 x 32-bit integers (totalling 4KB) and set each of these entries to point to our Queue Head. Then we use the USB registers (which are in I/O space for the UHCI adapter) to tell the adapter where the frame list is, and then to set it "running".
At this point, I have verified that the USB controller is running because the Current Frame Number (another of the I/O space registers) is incrementing as the USB adapter parses the list.
Ports
The UHCI registers also contain two "Port Status and Control" registers, one for each of the physical ports connected to the adapter. These registers allow you to find out if a device is connected, how fast the device is, and allow you to reset the device so that it can be configured.
Unfortunately, these don't seem to be doing anything, I can't enable the root ports or see connected devices.
I had thought from the USB specification that the EHCI (USB 2) controller wouldn't be a problem. In a system that has both USB1 and USB2 controllers (which is most of them these days), the EHCI adapter is responsible for controlling which ports are routed to which controllers. If the EHCI controller's CONFIGURE flag is not set, the hardware routes all the ports to the companion controller (the UHCI controller that I'm using). What I suspect is happening is that the EHCI controller has been configured by the BIOS because I'm using the BIOS' Legacy Support in order to boot from the USB key in the first place, and this is messing things up.
Finding the EHCI controller
I ran the PCI scan again and there is no sign of an EHCI controller, but I pretty sure that the Revo specification says it has USB 2. I was also able to find a forum post on the web where someone had posted a device list for their Revo R3700 as they were asking for help with an unrelated issue, but it lists the EHCI controller as a function of one of the PCI devices.
After much confusion, I found a bug in the PCI scanning code that I had been using for years. Some PCI devices have multiple "functions" and these functions are addressed separately when interacting with the device. Other devices have only one function, but that function responds to all the function addresses for the device (I found this with a RealTek network card before). In order to find out if a device has many identical functions, or has one function responding to all the addresses, you read part of the PCI configuration space for a flag which indicates if it is a single-function device, which I was doing. Unfortunately, this bit can be set on functions beyond the first function of a multi-function device, and that was being misinterpreted by my code. It was getting to the second function of the multi-function device, finding this flag was set, thinking it was a single-function device (which was obviously wrong) and skipping onto the next device.
With that issue fixed, I have located the EHCI controller (and a Wireless LAN controller which apparently fitted to this machine, who knew?)
Disabling the EHCI controller
With the address of the EHCI controller, I quickly skimmed the EHCI specification and wrote some quick and dirty code to find and reset the CONFIGURE flag for the EHCI adapter which should return the control of all of the ports to the UHCI controller.
UPDATE: Don't do this. I didn't realise that I also had to "take ownership" of the EHCI controller from the BIOS as well. I didn't and that caused the system to hang for about ten seconds after I connected or disconnected a device, presumably as the BIOS tried to get the disabled EHCI controller to connect to a port that it didn't own and things got confused. Anyway, lesson learned.
Moving on from this, I also found that the EHCI controller had six ports, and the three UHCI controllers had two ports each (which makes sense) and I had to work my way through the different UHCI controllers to find the one that had my USB Flash Drive connected (it was the only port with something in).
Resetting the Ports
A bit more USB theory now. Every USB device is assigned an address by the system and that address is used when sending commands to the device, except that the address is assigned by using a command, so which came first? Well, when you reset a USB port (by using the Port Status and Control register on the USB controller) the device also resets and then responds to address 0, which is a special address specifically for this task. Once the device has been reset, you issue a Set Address command to the device at address 0 to give it a number that is not already in use. This is also why the USB system only supports 127 devices instead of 128, because address 0 cannot (well, "should" not) be used for normal transfers,
Many hours of hacking and confusion later, I have a rough function which resets the port, issues a Set Address to the device, and then sends the Get Descriptor request to read the Device Descriptor \o/
I will post this function onto the blog once I have cleaned it up. It is a very rough-and-ready single function that goes through the steps of resetting the UHCI adapter, configuring the frame list, resetting a port, and issuing a GET_DESCRIPTOR transfer to the device. I'll post it in an attempt to save others the headache of getting to this point. Just having a function like this, in my opinion, puts a great deal of the specification into context and allows a developer to research a particular flag or variable with the knowledge of where it fits into the process. On top of all that, having some functional code that can be tweaked can be used to test out various variables to see what effect each of them have, and to compare to another implementation to find differences when one works and the other doesn't. I've seen forum posts where a new developer has been asking questions about implementing a USB driver and the responses have been to go and look at another driver's source code (such as Linux) which (again, my opinion) is a terrible idea. They need a clean implementation, not one that requires days of sifting through to see past all the implementation-specific details such as how they allocate the memory or what structures they use to store the device metadata, not to mention tracking through function pointers to work out where they were set and to what? I'm really annoyed that it has taken me so long and at least three attempts to get to this point, and annoyed at the documentation for dramatically over-complicating this basic process, and annoyed at various on-line sources for not having code like this posted already. Hopefully I can try to remedy that, at least to a small degree. /rant
I've taken a bit handful of various USB devices and run this code against each of them to read the device descriptors, most of them work but some are reporting HALT errors and some of them are reporting CRC errors. I guess some of them may not be compatible with USB 1, or my code is just plain wrong somewhere. :)
In either case, I think I might leave UHCI there and take the knowledge I have gained and look at applying it to a more elegant EHCI driver next as it's likely that will be more use in the long term.
2014-01-09
2014-01-09 USB ... En Garde!
In order to get my OS onto some real hardware for further tests, I've decided to revisit an old enemy, USB. Before now I have used PXE network booting to get various monolithic test kernels onto hardware for some real world testing, and at least one of my previous test kernels had a UDP based filesystem that it could use to load files from a network server. Whilst I could use the same approach for the Octopus kernel, I would like to crack the USB nut to be able to use USB Mass Storage devices. I quite like the idea of having a flash drive that I can plug into almost any machine and boot my OS.
I have looked at USB before, but I have always found a very large amount of USB documentation and specification (much of it only relevant if you're creating USB hardware), and very small amount of good USB example code. While I appreciate the point that developers shouldn't implement something they don't understand and that asking for example code is a big no-no, a small amount of actual implementation answers a significant number of questions that new developers may have, provides a codebase full of keywords that can be researched in the (significant) documentation, and also gives a working baseline implementation that can be tweaked and experimented with to explore the interface and help debug their own implementation.
All that aside, I had no specific goal to achieve by investigating USB before and many reasons to investigate other things, so the specification documents were filed away under "tl;dr".
Anyway, before we can actually get down to some proper USB implementation, I'll need a system on which to test. For this purpose, I have set up one of my machines, an Acer Aspire Revo R3700, and dug out a random 4GB USB2.0 flash drive.
Up until now I've been using the Bochs emulator to test the Octopus kernel so far. My Bochs configuration has two hard drives, the first is a small image file onto which I installed Grub (Grub Legacy), the second is a VVFAT-type hard drive where Bochs takes the contents of a folder on the host OS and emulates a FAT partition which contains those files. The configuration file for Grub then loads the kernel from the second hard drive. Grub Legacy has to be installed onto an image-type hard drive because it has to know exactly which blocks contain the rest of its code.
I copied the Grub hard drive image onto the key and this worked beautifully on the Revo, and I set up a second partition on the key by editing the partition table entries (1337 H4XX!). Unfortunately, it appears as if Windows doesn't fully support partitions on a USB flash drive (no idea why). It reads the partition table correctly, and handles the first partition correctly, but none of the others show up.
A LOT more tinkering later and I have a 1GB partition on the USB drive with GRUB installed, a copy of my kernel, Windows recognises it, and the Revo boots from it. (I know it's 4Gb key, but I REALLY don't need that much space yet.) It's worth noting that the reason it boots is because the BIOS has the capability to load from a USB mass storage device, but as soon as I enter protected mode (which Grub does for me) and the BIOS interrupts are no longer available, I'm on my own.
With this set up in place, I can compile a new version of the kernel in NetBeans, copy the output file onto the USB drive, put it into the Revo, and boot the new changes. It's a bit more cumbersome than the PXE booting I've used before, but should work on most modern machines without needing a network cable and a second machine to run the TFTP server.
Now to actually start writing the USB driver ...
2014-01-01
2014-01-01 Chunky-To-Planar Conversion
Continuing with the goal of increasing the speed of the rendering to the mode 0x12 screen, I'm looking at improving what used to be called C2P, the Chunky-to-Planar conversion. This is the procedure which takes the "chunky" or "pixel-packed" data where all the bits encoding one pixel are next to one another, and converting it into "planar" data where where the first bit of each pixel are next to one another, followed by the second bit for each pixel, etc.
In my code, the output from the quantiser is a bitmap of "chunky" bytes where the least significant four bits identify one of the 16 possible palette colours (the upper bits are unused). To output this to the mode 0x12 screen, I take this data eight pixels at a time and convert it into four bytes where the first byte contains the first bit from each of the eight pixels, the second byte contains the second bit from each of the eight pixels, and so on. These four bytes can then be put into the back buffer, one in each plane.
The previous routine was written entirely in C, and looped through each of the eight pixels and used bit masking and shifting to populate an array of four bytes, then it loaded these into the planes. Suspecting that this heavily used piece of code could be more efficient, I thought I'd put in a small blob of assembly to do the heavy lifting.
After a few tests, some experiments, much confusion, very unhappies, such code and many wow, I came up with a mechanism that gives the correct output. I also unrolled the loop to make the best use of the CPU pipeline (it was only four iterations after all). The code now uses the assembly RCR instruction to rotate the first bit from the first byte into the CPU CARRY flag, then it uses the RCL instruction to rotate that CARRY bit into the DL register, then increments the pointer to move onto the first bit of the second byte.
The assembly looks something like this (eax starts out loaded with the address of the first pixel):
rcrb (%%eax)
rclb %%dl
inc %%eax
After running these three instructions eight times, each of the first plane bits have been rotated into the DL register, and we can load this into the corresponding plane byte of the back buffer.
The code then repeats the exact same procedure again, although as the pixel bytes were rotated by one bit the first time, this iteration gets all the bits corresponding to the second plane. Two more iterations and the C2P conversion is complete in 100 assembly instructions (including reloading eax) with no jumps.
The only downside to this process is that the source pixel data is destroyed by the process as the rotation fills the byte with whatever was left in the CARRY flag (actually it's whatever came out of the DL register, so I guess that means that whatever data was in DL before we started will be "P2C" converted back into the source buffer).
With this rotator in place, it has knocked about 300ms off each frame, so (with dithering) it's maintaining 0.99 FPS. It's good, but it still hasn't broken the 1 FPS mark.
With some more tweaking, I've moved where in process the resolution is doubled. Because Doom outputs a 320x200 resolution screen, I double this to 640x400 to display on my Mode 0x12 screen. Before I had the video driver specifically written to double the input buffer by calculating the required byte offset for each pixel. I wasn't keen on that because it was a special case in the kernel, even if this is the only thing it does yet.
I've moved this into the Doom renderer itself so that Doom sends me a 640x400 bitmap that the video routine can just iterate through to quantise and render. This has increased the frame rate to 96 ticks per frame = 1.04 Frames Per Second \ o /
Moving on, I'm looking at the mechanism used to perform the dithering. Currently the procedure calculates the error for each component into a set of signed 8-bit integers, then adds these onto the next pixel before quantising (see the "Displaying Images in 16 Colours" article for more information). This is all done in C and takes nearly half a second per frame on the emulator to perform.
I'm wondering if I can perform the arithmetic on the 32-bit 0RGB integer instead. If I set the least significant bit of each byte ( data | 0x01010101 ) before performing a 32-bit subtraction so that a "borrow" in one component will not affect the next, then clear the least significant bit of each byte ( data & 0xFEFEFEFE ) before performing the add to prevent a carry from one component overflowing into the next, I should be able to calculate the three component error values in only a few operations without having to extract each byte from the 32-bit value.
With this new carry mechanism in place, the frame rate is up to 1.6 FPS, but the dithering is not correct, so I may have to look into this more.
UPDATE: As I'm sure you were all quick to point out, this logic is fatally flawed. This doesn't work when a component plus its carry equal more than 255 because it doesn't clamp the value at 255, it just wraps around and generates a very low value instead. I'm also not convinced that the byte-wise negative numbers are going to work either. I have abandoned this for now until I can come up with an efficient way to address these issues.
With the dithering disabled, the new C2P routine and with Doom doubling the output gives a jaw-dropping 1.96 FPS. It almost looks fast enough to play, except without dithering, almost everything quantises to black :(
I'm happy with the C2P routine, but the other two seem to give only minor improvements. I'm wondering about trying to get this onto real hardware to see how much of the performance is the Bochs emulator on my machine.
Subscribe to:
Posts (Atom)